Perth Insulation Removal is a crucial part of any home improvement project. It allows you to examine and repair existing issues that might affect energy efficiency, such as moisture buildup or pest infestation.
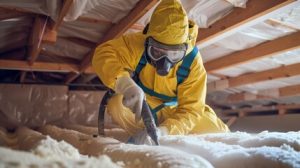
To avoid contamination, it’s important to wear protective gear, including a respirator mask and gloves. You’ll also need a high-powered vacuum hose and heavy-duty waste bags.
Insulation is an important part of a home’s structure, but it can become damaged or outdated over time. This can lead to problems with regulating temperature and musty smells. In addition, deteriorating insulation can make it more difficult for your electrical systems to operate properly. In some cases, it may be necessary to remove old insulation completely to restore your home’s energy efficiency and comfort.
When it comes to removing insulation, proper preparation is key to ensure a smooth and safe process. This includes ensuring adequate ventilation in the attic space, which can be done by opening windows and using fans to promote airflow. It’s also crucial to wear proper protective gear, such as a mask and gloves, to minimize the risk of inhaling harmful particles.
Another important step is to check for signs of mold or mildew growth, as these can pose serious health hazards if they are not addressed promptly. Additionally, it’s important to determine the type of insulation in the attic space before beginning the removal process. Different types of insulation require different methods of removal and disposal, so it’s important to know what you’re dealing with beforehand.
Before removing old insulation, it’s important to turn off any electricity in the attic space and disconnect any live wires. This can prevent injuries or damage to your electrical systems. It’s also a good idea to remove any insulation that has been contaminated with hazardous materials, such as asbestos, which can pose severe health risks.
It’s also a good idea to assess the attic space and look for any areas that need additional attention, such as rodent or pest infestations, water damage, or other structural issues. This can help you decide whether or not to hire a professional for the job. Finally, it’s important to check with local waste management authorities and municipalities regarding regulations for disposing of insulation waste. This will help you avoid any fines or penalties. Also, if possible, it’s a good idea to recycle or reuse as much of the old insulation as you can. This can reduce your carbon footprint and help the environment.
Safety Measures
Insulation can contain harmful substances, including hazardous materials like asbestos and mold, which may cause health risks. Removing old insulation properly is a necessary safety measure that protects indoor air quality, minimizes the spread of contaminants, and ensures a clean removal process. Using appropriate personal protective equipment (PPE) such as a respirator, gloves, goggles, and coveralls can help safeguard against long-term lung damage. It’s also important to seal off the work area and minimize inhalation risks by setting up ventilation and utilizing proper disposal methods.
Before starting the insulation removal process, it’s crucial to assess the space and familiarize yourself with the layout. This will make it easier to navigate the attic and determine which areas can be accessed without compromising the integrity of your roof or creating unsafe pathways. It’s also a good idea to turn off your heating, ventilation, and air conditioning system, cover any registers or vents, and place plastic sheeting over the floor to protect against dust and debris infiltration.
Identifying the type of insulation is another essential step in the preparation process. Different types of insulation require unique removal techniques and special PPE, so it’s important to know what you’re dealing with before proceeding. Common types of insulation include fiberglass, cellulose, and spray foam, all of which require specific safety measures.
It’s also important to choose the right tools for the job. A specialized vacuum with a HEPA filter is the best option for capturing harmful particles, while a high-powered handheld drill with a drywall blade is effective for removing hard-to-reach areas. Regular tool maintenance is also important for ensuring optimal performance and safety.
It’s a good idea to start at the furthest point from the attic entry and roll up each layer of insulation as you go. This minimizes the release of dust particles and makes it easier to transport the insulation out of the attic. Rolling up the insulation also helps it stay intact and prevents loose fibers from escaping, which can make them a hazard to your health. Lastly, remember to double-bag the waste to prevent accidental inhalation of the insulation material and to use environmentally friendly disposal methods.
Essential Equipment
The right equipment can make or break the success of your insulation removal project. Having the right tools will ensure that you can complete the task in a safe, efficient manner. You will also need the right safety precautions to minimize potential health and environmental hazards.
In addition to the proper tools, it’s important to have the right protective gear when performing a DIY insulation removal project. This includes gloves, a mask, and goggles to protect against mold spores and dust particles. You should also have a commercial vacuum designed for insulation extraction to effectively remove loose-fill or batt insulation. Finally, it’s a good idea to have heavy-duty waste bags on hand for easy disposal of the insulation material.
Insulation removal is often necessary to address a variety of issues. For example, old or damaged insulation can lead to high energy bills. Additionally, pest infestations, water damage, and contaminated materials can affect the effectiveness of your home’s insulation. In these cases, it’s often best to replace the existing insulation with new, more efficient materials.
Depending on the type of insulation you have, you may need to use a special chemical solvent to remove the adhesive properties that hold the material in place. Then, you’ll need to use a scraper or putty knife to remove the old insulation from surfaces.
If you’re removing spray foam insulation, it’s essential to have a special respirator to help protect against the volatile organic compounds that are released during the removal process. You’ll also need a commercial vacuum with a HEPA filter to trap airborne toxins and minimize the risk of contamination.
Finally, it’s important to have a sturdy ladder and the correct equipment for accessing your attic space. For instance, you’ll need to clear a path from your front door to the attic entrance and cover this area with protective sheets. Once you’re ready to begin, it’s a good idea to work from one end of the attic to the other to prevent missing any sections and ensuring consistent insulation removal. A ladder with a built-in stabilizing bar will improve your comfort and safety while working in the attic.
Hiring a Professional
Whether you’re upgrading your home or building a new one, insulation removal is an important step to maximize the impact of energy efficiency upgrades. Old or damaged insulation can actively harm your home, causing drafty rooms and increasing utility bills. Moisture trapped within outdated insulation promotes mold growth and rodent activity, leading to a host of health issues that affect indoor comfort and air quality. In addition, these problems can create inefficient homes that fail to comply with current building codes.
Insulation specialists can identify the condition of existing insulation materials, recommend effective solutions, and ensure proper disposal. They will also provide insight into the best type of replacement insulation, helping you save money and optimize energy savings. Insulation removal isn’t a project that can be easily handled by homeowners, as the process involves working in tight spaces and requires specialized tools. Homeowners who attempt to remove their own insulation can face a host of hazards that can lead to injuries and property damage.
Professionals are well-versed in navigating tight spaces, utilizing the proper equipment to handle difficult tasks, and adhering to local safety guidelines. They will carefully inspect and assess the condition of your insulation before beginning the removal process, and they have the expertise necessary to address any unexpected issues that may arise.
In addition to ensuring that the job is completed safely, professionally removing insulation also helps prevent any accidental damage to the existing structure of your home during subsequent renovations and improvements. For instance, attempting to work around existing insulation while installing new lighting, fans, or rewiring can result in expensive and time-consuming repairs.
Inconsistent indoor temperatures, musty odors, and signs of pest infestation are all indications that your insulation is in need of replacement or repair. However, many homeowners are surprised to learn that the problem lies with their old or damaged insulation.